GEORGE®
Flooring and Staircase

One-Stop Building Materials · Flooring and Staircase

Flooring and Staircase for Your Project

Compare flooring constructions, plank layouts and complete staircase arrangements. Define the finished levels, substrate, opening and adjoining details before selecting the final products.

Flooring and Stairs Start with the Level Plan

Flooring and staircase choices meet at the finished floor level. A selected floor has its own construction, surface and installation system; a staircase combines geometry, support, treads, landings and railing. Plan these as related systems so the material choice and the stair opening can be reviewed together.

The flooring references cover solid wood, engineered wood, laminate, SPC, vinyl and outdoor decking, with straight-plank and patterned layouts. Stair references show straight, turning, curved and spiral arrangements. The images illustrate catalogue product and design directions; they do not establish structural suitability or show a verified George installation.

Ceramic and porcelain flooring are covered in Ceramic Tiles. Natural and engineered stone surfaces, including fabricated stone treads, are covered in Marble and Granite. Here, the focus is the floor system, adjoining levels and complete stair assembly. A stone-look vinyl surface remains a vinyl product, and a stone tread remains one component of a staircase.

Choose the floor

Solid Wood and Engineered Wood

Wood appearance and wood construction are separate choices. Grain, colour and plank format describe the visible surface; the board section describes the product underneath. The checked catalogues distinguish solid wood from multilayer and three-layer engineered wood, so the enquiry should identify the intended construction as well as the finish.

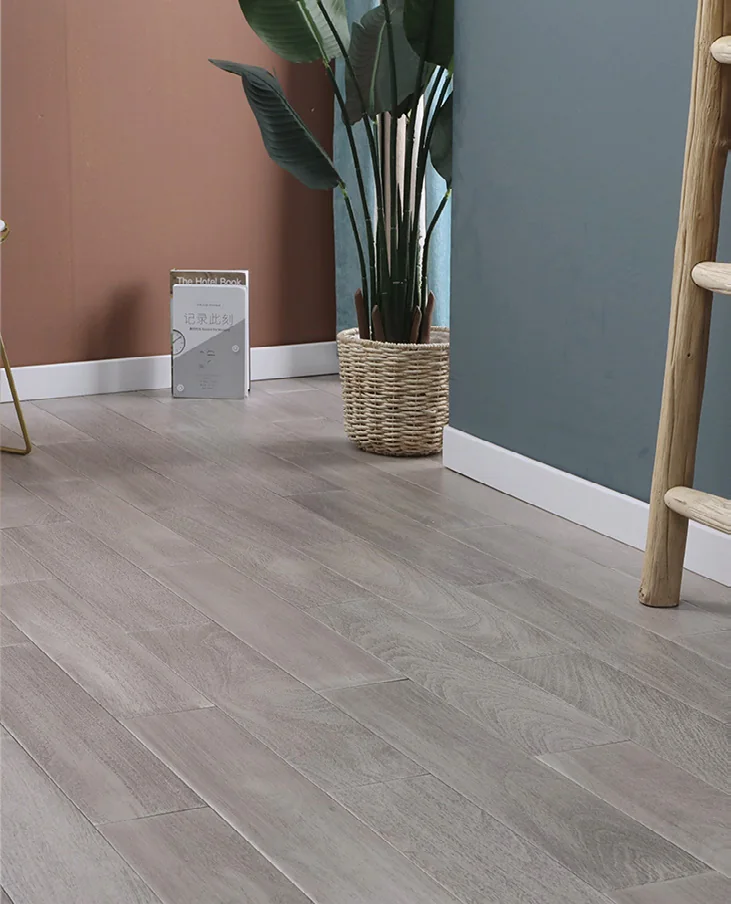
Grey-toned wood flooring laid in straight planks beneath a chair
Solid Wood Flooring Catalogue

Solid wood boards

Solid wood flooring uses a wood board through its thickness. Compare the species or material description, face selection, overall dimensions, edge detail and surface finish. A room photograph helps judge the visual direction, while a board sample shows the actual surface and edge more clearly.

The solid-wood catalogue includes both close views of boards and room arrangements. Use these as selection references rather than treating every image as the same species or grade. Grain, knots and colour can differ across a selection; ask what range of appearance belongs to the chosen reference and review enough samples to understand it.

Refinishing, moisture conditions and heating compatibility depend on the selected product and installation arrangement. They should be addressed in the product information for the proposed floor. Do not assume a care method or service life from the word hardwood or from a polished catalogue photograph.
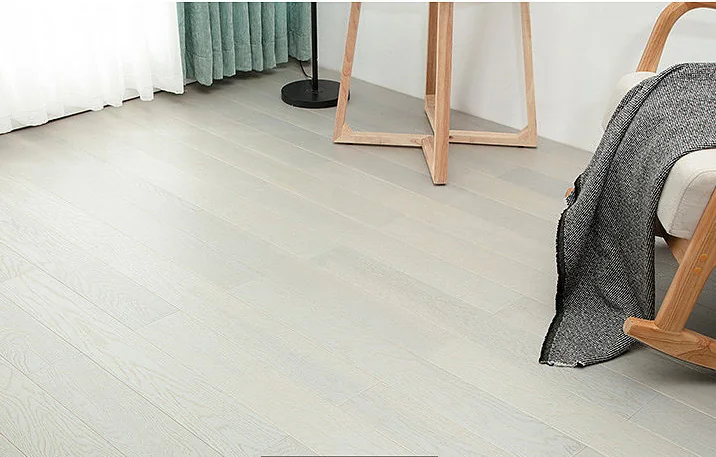
Pale engineered wood planks in a catalogue interior
Engineered Wood Flooring Catalogue

Engineered wood boards

Engineered wood has a real wood surface over a layered construction. The catalogue separates multilayer and three-layer references. Identify the surface species, top-layer thickness, total board thickness and underlying construction when comparing quotations; a similar face colour can sit on a different board build-up.

Connection profile and installation method belong with that construction. Request a board section and the product-specific installation information, including the substrate and any underlay or adhesive requirements. Where underfloor heating is planned, send the heating arrangement and ask for the selected floor's stated conditions; the family name alone is insufficient.

SPC, LVT and Laminate Flooring

These products can share a wood-look or stone-look surface while having different cores and installation arrangements. Separate the decorative appearance from the board or tile construction. The quotation needs the exact product family, connection system and total floor build-up, not just a colour name.

Rigid-core vinyl

SPC flooring

SPC is a rigid-core vinyl flooring family. The checked SPC catalogue contains different plank sizes, thickness series and herringbone references. The model number and section information identify the proposed configuration; one series cannot stand for every SPC floor in the range.

An attached backing and a separate underlay are different parts of the floor arrangement. Identify what is included in the board and what the installation system permits below it. Do not add a second layer simply because another quotation includes one; compare the actual proposed system with its instructions.

Vinyl formats

LVT and other vinyl formats

The original LVT catalogue includes dry-back references with wood and stone visual directions. A dry-back selection needs its own installation information and substrate requirements. It should not be treated as the same assembly as a rigid click-connected board merely because both use a vinyl surface.

Specify whether the request is for planks, tiles or another vinyl format and identify the proposed fixing method. Ask for overall thickness, wear-layer information and any backing. Where the design uses stone-look vinyl, keep the material clearly named so it is not confused with the ceramic or stone products shown on adjacent pages.

Decorative surface and core

Laminate flooring

Laminate uses a decorative surface over a core construction. Compare the board section, surface description, thickness and joint profile for the selected reference. The catalogue family can offer a visual alternative to timber without establishing the same material, refinishing options or response to site conditions.

Water exposure, abrasion, fire classification, emissions and heating suitability require the selected product's documents. Broad terms such as waterproof, fireproof or maintenance-free should not replace those records. Send the intended room use and any specified test or classification requirements so the proposed product can be checked against them.

Plank Direction, Herringbone and Parquet

The laying pattern changes how a selected floor reads across the room. Straight planks, herringbone, chevron and geometric panels should be chosen with the plan, rather than added as an interchangeable finish after quantities have been calculated. Pattern is a layout decision, and it does not identify the underlying material.

Straight plank layout

Compare the board width and length with the room proportions and the direction of adjoining spaces. Mark the intended direction, starting line and transitions on the plan. Where rooms connect, decide whether the pattern continues or stops at a doorway or threshold.

Product dimensions and permitted joint arrangements belong to the selected system. The layout drawing can show the design intent, while the installer checks the product instructions and site. A wide-plank catalogue scene is useful visually but does not determine the correct installation layout for another room.

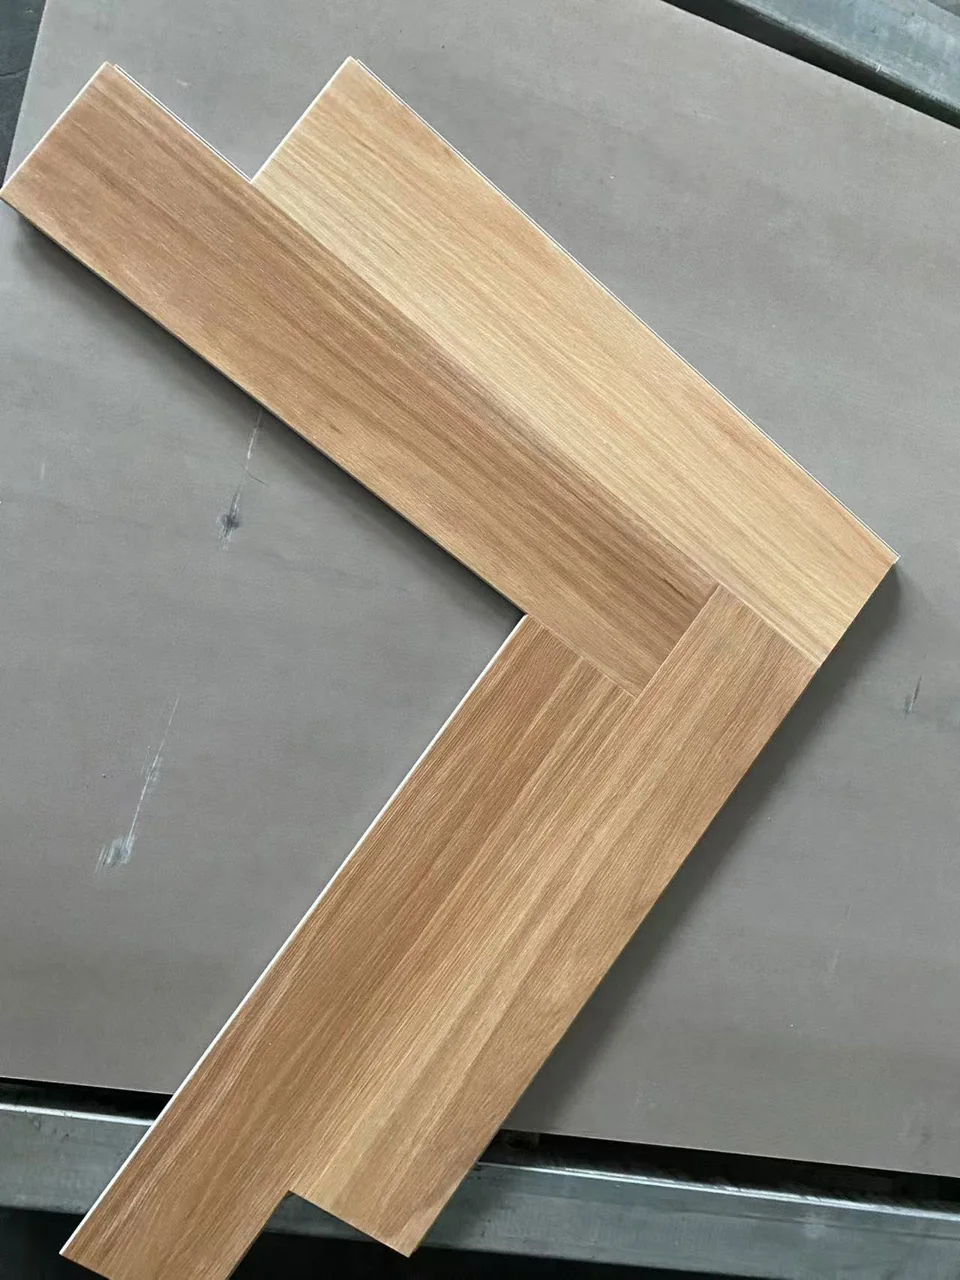
Light SPC herringbone board sample with visible locking edges
SPC Catalogue · Light herringbone
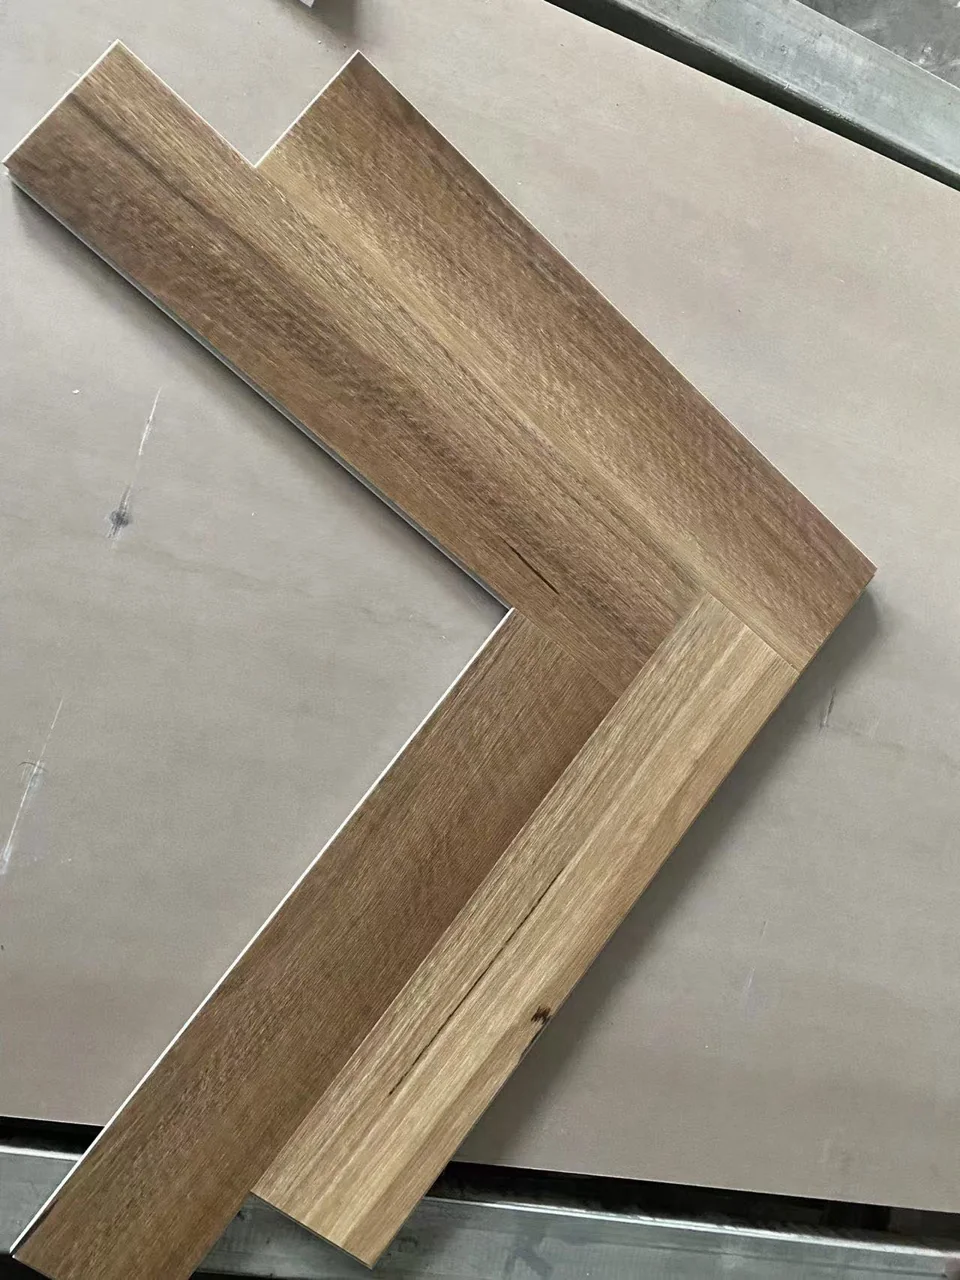
Brown SPC herringbone board sample with visible locking edges
SPC Catalogue · Dark herringbone

Herringbone and chevron

Herringbone uses a staggered arrangement of rectangular pieces; chevron forms align angled ends into a repeating V. The product geometry and connection parts must suit the intended pattern. The SPC catalogue's herringbone samples show the joined pieces and edges, making the layout visible without implying all planks can form that pattern.

Identify any handed pieces, border treatment, direction and pattern scale in the schedule. Ask for the set composition and product-specific layout information. Patterned installations can change cutting, quantities and sample requirements; record those assumptions separately from the net room area.

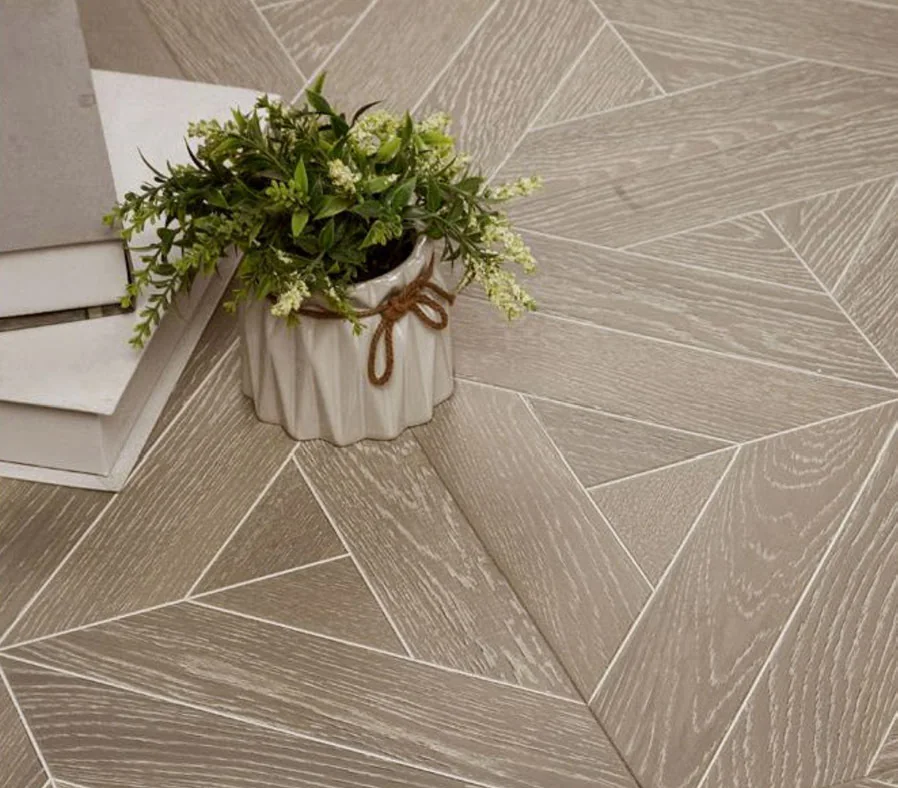
Geometric parquet floor panel pattern under a small table
Flooring Catalogue · Parquet

Geometric parquet panels

Panel arrangements create a larger repeating pattern, with lines or grains crossing within each unit. Compare the actual panel reference, dimensions and finish with the plan. Check how the pattern meets room boundaries and whether a border is part of the intended composition.

Use a physical sample or assembled reference to review the joints and the visible repeat. Parquet describes an arrangement, not a single construction: the product schedule should still state the material, layers and installation system. Do not substitute an unrelated board merely because its colour resembles one part of the panel.

Coordinate its construction

Substrate, Floor Build-up and Transitions

The visible floor is only the upper part of the assembly. Substrate preparation, moisture conditions, adhesive or underlay and adjoining finishes affect the complete build-up. Collect these conditions before choosing the final product and keep the installation requirements specific to that selection.

Floor build-up and adjoining finish informationA schematic section names the flooring, permitted underlay or adhesive, substrate and adjoining tile or stone, with the finished levels to coordinate. No dimensions are prescribed.Flooring + total build-upAdjoining tile or stonePermitted underlay / adhesiveSubstrateConfirm the junction, movement detail and finished levels.
  • 1. Flooring: selected finish and its full build-up
  • 2. Adjoining finish: tile or stone and its finished level
  • The pale layer is permitted underlay or adhesive; the grey base is the substrate
  • Junction, movement detail and transition
Schematic field guide, not to scale. Layer thickness and installation conditions come from the selected system.

Below the surface

Conditions below the floor

Identify the substrate, its current condition and whether the building is new or being renovated. Include relevant moisture, heating and environmental information already recorded by the project team. The selected manufacturer's instructions and the local installer determine the preparation and installation conditions.

An existing floor is not automatically a suitable base for a new system. Its level, stability, surface and any underlying moisture need to be reviewed. If the substrate is still being prepared, show the intended finished level and the total space available for the floor assembly.

At the finished level

Build-up and adjoining levels

Record the flooring thickness together with any permitted backing, underlay or adhesive layer. Coordinate that total with doors, cabinetry, thresholds and the first or last stair tread. A change of product thickness can alter the transition even when the visible colour remains the same.

At a junction with tile or stone, each material retains its own installation requirements. Show the level difference, joint location and intended transition profile. The floor schedule should identify the junction; it should not import the tile or stone specification into the timber or vinyl product row.

At the edges

Skirting, thresholds and nosings

List skirting, edge trims, thresholds and stair nosings as separate components. Specify the location, length or quantity, profile and finish reference, and identify how they relate to the floor system. A matching colour does not establish the right profile or fixing arrangement.

Movement allowances and joint locations must follow the selected system's instructions. Do not cover a required joint with a rigid detail simply to continue the appearance. This page covers the floor's necessary edges and transitions; wall-panel systems are outside the flooring selection.

Outdoor Decking and Its Substructure

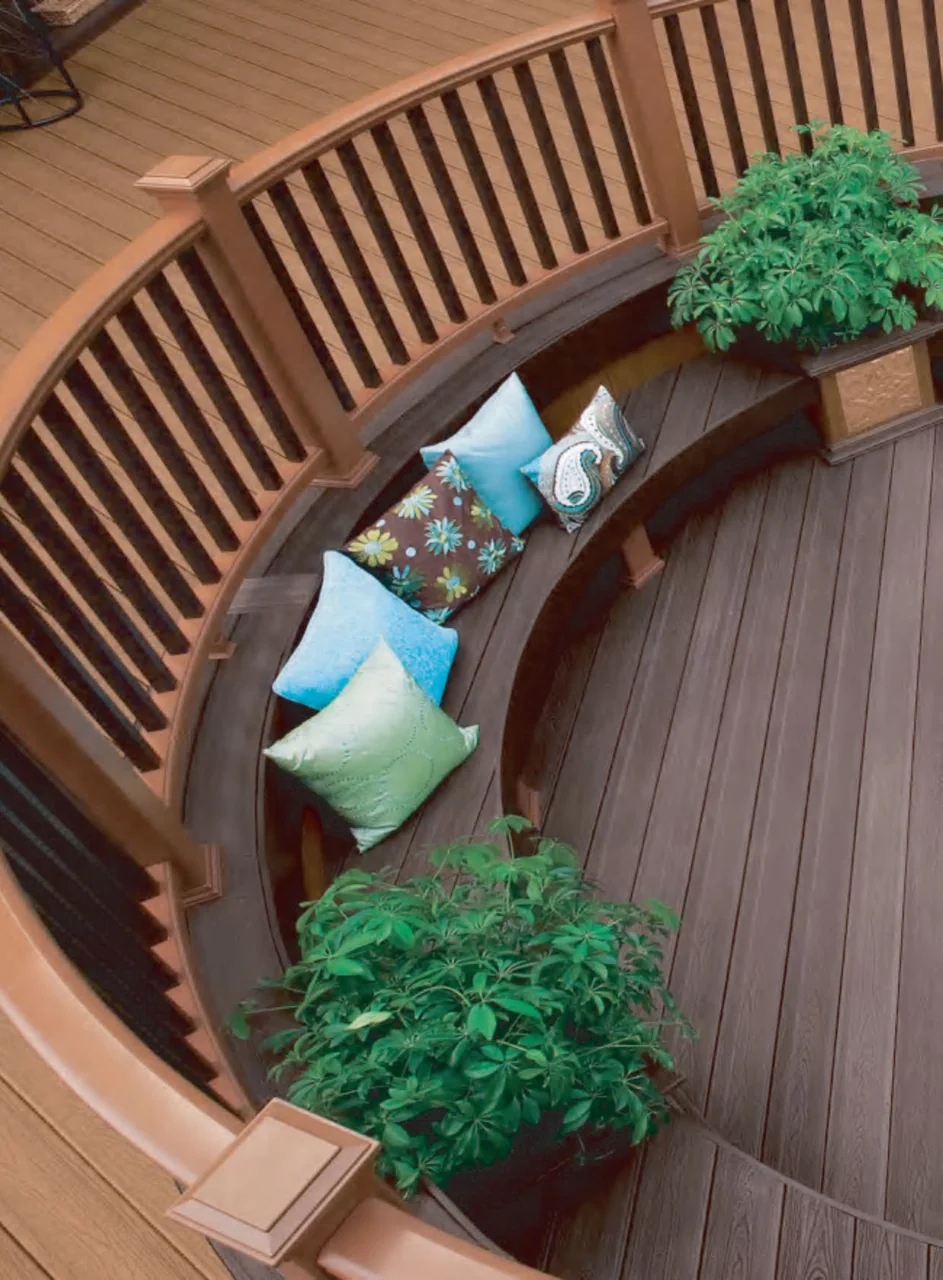
The checked outdoor catalogue shows decking boards, hollow profiles and different surface directions. Outdoor decking is reviewed as a board and substructure arrangement, with fixing, drainage and edges considered together. A terrace scene illustrates the visible result but cannot establish the construction below it.

Brown decking boards around an outdoor seating area
Outdoor Decking Catalogue
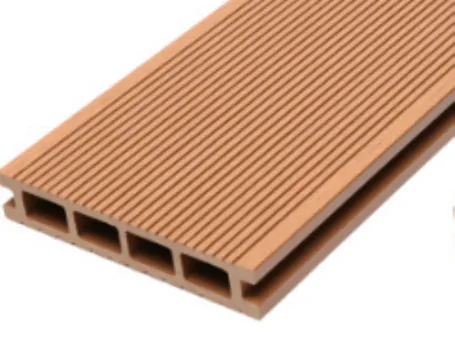
Hollow outdoor decking board profile shown in the WPC catalogue
WPC Catalogue · Hollow board profile

Board profile and surface

Compare the exact profile, section, surface and finish of the proposed board. Where a catalogue distinguishes capped or co-extruded constructions, request the selected product's section rather than inferring the construction from its colour. Record the board reference and the matching parts required for edges or ends.

The outdoor WPC references belong to a different use and installation arrangement from indoor vinyl flooring. Do not treat the shared composite terminology as proof that the products are interchangeable. Ask for the intended application and product-specific performance documents.

Support, fixing and drainage

Identify the planned base, support arrangement and finished height. Request the appropriate clips, fixings, edge pieces and installation information for the selected decking system. Support spacing, movement and drainage need project-specific review against those instructions.

If lighting, railings or other elements meet the deck, mark their interfaces separately. The catalogue also contains wall cladding and other outdoor products; they are not added to this floor page. The enquiry remains focused on the decking assembly and the conditions needed to specify it.

Define the staircase

Choose the Stair Form Around the Opening

A stair form describes the route between levels. The original staircase catalogue separates straight, L-shaped, U-shaped, curved and spiral arrangements. Open-looking or floating references describe a visual and support concept that still requires a defined structural system.

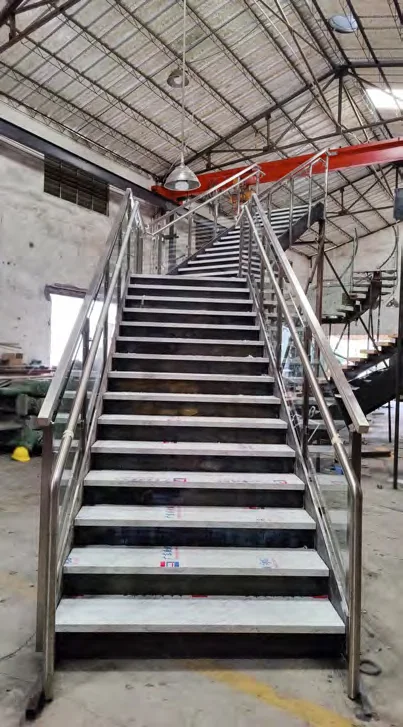
Straight metal stair flight with railing in the staircase catalogue
Staircase Catalogue · Straight flight

Straight and turning stairs

A straight flight follows one direction. Turning arrangements change direction through a landing or another designed transition. Compare the plan footprint, entry and exit positions, available opening and the way the stair meets adjacent rooms.

The usable space is more than the outline of the treads. Show doors, circulation, nearby walls and the landing edge. A photograph can help choose the appearance, but the actual plan and section establish whether the proposed arrangement fits the opening and finished levels.

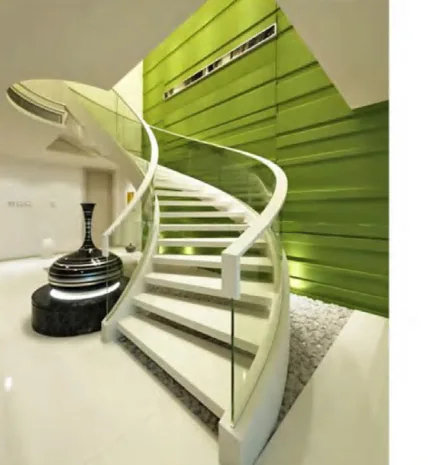
Spiral staircase with pale treads and a curved handrail
Staircase Catalogue · Spiral form

Curved and spiral stairs

Curved arrangements sweep through the plan, while spiral forms turn around a central area or support. These are distinct geometries, not interchangeable names for a compact staircase. Their treads, handrails and support need to be designed as a coordinated assembly.

Include the opening shape, orientation, entry and exit positions and the available height. The local design and engineering team must confirm the applicable geometry and use requirements. A catalogue spiral image does not prove that the same form is suitable as a required access or escape route for another building.

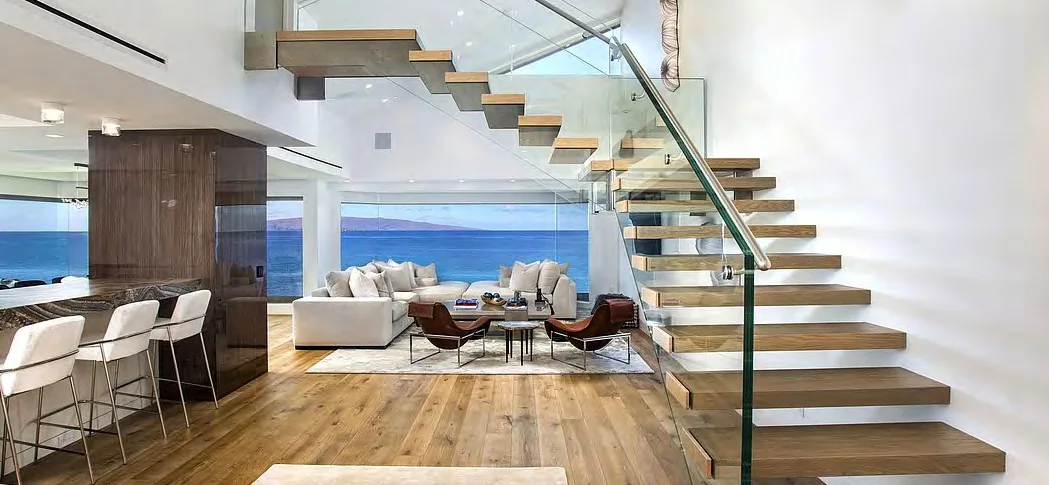
Turning open-riser stair with pale treads and glass balustrade
Staircase Catalogue · Turning flight

Open and floating appearance

An open-riser arrangement leaves space between treads. A floating appearance may rely on a visible central support, side supports or another engineered connection. State the intended support concept and ask for the actual proposed assembly, rather than assuming that hidden support means no support.

Keep the structural wall, floor and landing connections in the project drawings. Finish panels and photographs do not establish the load path or fixing suitability. No standard load, span or compliance promise applies across the catalogue; these need the project's relevant professional review.

Treads, Support, Railing and Handrail

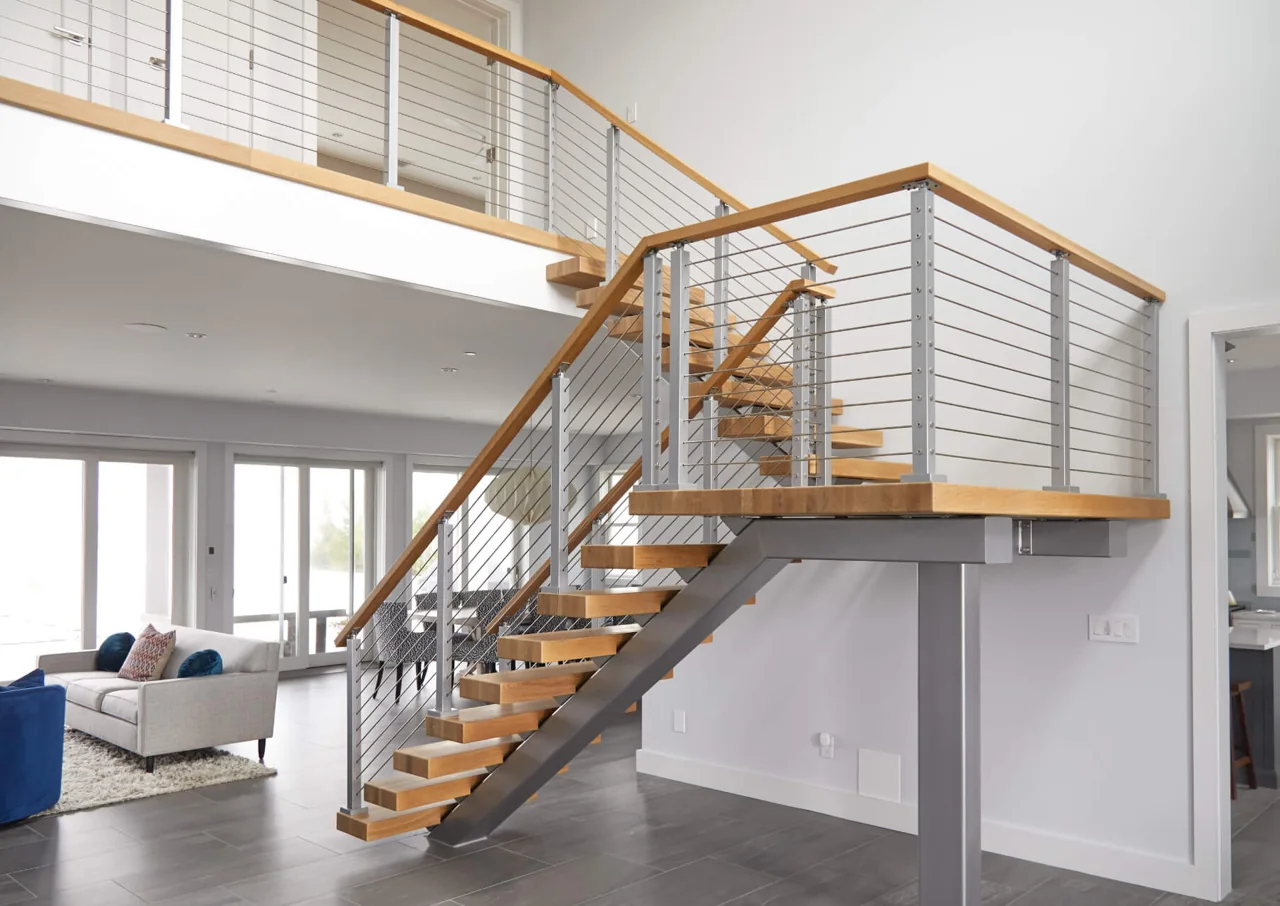
A complete staircase is more than its tread material. Define the support, tread and riser arrangement, landings, railing, handrail and connections. The checked catalogue examples combine timber, metal and transparent elements in different ways, so the quotation must identify the selected assembly rather than a generic style name.

Turning staircase with wood treads and horizontal metal railing
Staircase Catalogue · Complete assembly
Exterior stair and landing with horizontal stainless-steel railing
Flooring Catalogue · Railing

01 · Tread and landing

Treads, risers and landing finish

Record the tread material, visible edge and intended riser treatment. Coordinate the first and last tread with the finished floor build-up, and show any landing finish separately. A tread edge or nosing may need a different component from the field flooring beside it.

Where stone treads are selected, the material, slab, finish and fabrication details remain in Marble and Granite. The staircase schedule carries their finished dimensions, support interfaces and relationship to the assembly. A stone surface does not establish the structure that carries it.

02 · Guarding and handrail

Railing and handrail

Railing infill and the handrail are related but different components. Catalogue references show glass, metal and timber directions. Identify the infill arrangement, posts or channels, handrail profile, finish and continuity around the landing or turn.

Fixing positions, supporting edges and joints should be shown with the stair drawings. Glass and metal specifications, loading and applicable guarding requirements need confirmation for the proposed system. The appearance of a transparent panel or horizontal rail does not prove that it meets the project's safety requirements.

03 · Connections and interfaces

Fittings and lighting interfaces

List the connectors, brackets, end pieces and covers included with the selected system. Their geometry must match the posts, rail or panels being quoted. Avoid assembling a combination solely from separate catalogue images that happen to share a finish.

If tread or handrail lighting is planned, coordinate space for the light, cable route and service access with the stair detail. The fixture and electrical specification belong in Lighting. The stair supplier and project team need the same drawing revision to review how those components meet.

Linear lighting for stair details

Measure the Opening and Finished Levels

The staircase enquiry needs both a plan and a section. Overall floor-to-floor height alone cannot describe the opening, landings, clearances and fixing surfaces. Identify the drawing revision and distinguish measured finished dimensions from dimensions that still depend on construction work.

Plan information

Stair opening plan measurement fieldsOpening length, width and shape, with entry and exit positions. No dimensions are prescribed.Opening lengthOpening width and shapeEntryExit

Show the opening length and width or its actual shape, surrounding walls, entry and exit directions and the landing outline. Add doors, windows and other obstructions that affect movement around the stair. Mark the intended railing and the edges that need guarding.

For a renovation, include clear photographs alongside measurements, with the relevant positions identified. Photographs provide context but do not replace dimensions. Note whether wall and floor finishes are complete, and show any proposed changes that alter the usable opening.

Section and support information

Stair section and finished-level fieldsFinished lower and upper levels and overhead obstruction. No dimensions or structural details are prescribed.Overhead obstructionFinished lower / upper levelsIdentify support and landing levels

Show the finished lower and upper floor levels, the floor build-up, landing level and overhead obstructions. Identify where the stair is intended to connect to the building and what supporting construction is available. The project's designer and engineer confirm the geometry, support, loads and applicable requirements.

Do not use a catalogue drawing as a construction drawing for another opening. The diagram here names the measurement fields only; it has no prescribed rise, going, headroom or structural detail. Request the proposed project drawing for review before approving a staircase.

Measurement fields only, not to scale. These are not structural drawings or installation details.

Access and assembly scope

Identify the route into the building, available openings and any limits on bringing in large components. Ask which parts are delivered assembled, which are separate and what drawings or component identification are proposed. These are quotation questions, not a promise of a particular installation or packing method.

Record responsibilities for site preparation, fixing review and on-site installation in the project scope. A design reference or catalogue assembly does not transfer those responsibilities automatically. Services explains broader coordination support; this page identifies the product and site inputs needed for the stair.

Samples, Quantities and the Product Schedule

Prepare separate schedules for the floor areas and the staircase, linked by room and finished-level information. For floors, list the product reference, construction, finish, pattern, net area and associated trims. For the stair, identify the form, opening, assembly, finish and latest drawing.

Separate floor and staircase schedules joined by finished levels
InformationFloor scheduleStaircase schedule
Product identityFamily, construction, reference, surface and connectionForm, support concept, treads, risers, landing and railing
DimensionsBoard/panel dimensions and full floor build-upOpening plan, finished levels, proposed plan and section
AppearanceColour range, edge, direction, pattern and sampleTread, handrail, metal/glass and finish references
InterfacesSubstrate, heating, moisture, doors and transitionsFixing surfaces, landings, adjoining floors and access
QuantityNet area, order allowance, borders, trims and sparesAssembly count, component list and drawing revision
DocumentsSelected product sheet, installation/care and required test recordsProject drawing, engineering review and selected system information

Review the physical selection

Use floor samples to compare colour, texture, edge and joint appearance with adjacent materials. For patterned floors, review an assembled arrangement when one piece cannot explain the repeat. For stairs, identify the tread, handrail and metal or glass finish references that need approval.

State quantity assumptions

Keep net area separate from the order quantity and record the cutting or wastage assumptions used by the project team. Pattern, borders, room shape and spare material requirements can change the order. Do not treat a catalogue stock label as confirmation of current batch or availability.

Request a defined quotation

Send the plans, sections, destination and schedules on one revision. Identify unresolved measurements and items supplied locally. Request the selected product sheets, included components, installation and care information, with the proposed labels and packing for boards, trims and stair parts. Confirm supply conditions and timing in the quotation.

FAQ

Flooring and Staircase Questions

Material, finished-level and opening information to prepare for your enquiry.

Which site conditions affect flooring selection?

Room use, substrate, moisture and temperature conditions, and any underfloor-heating requirements. The chosen product and installation system should be checked against the manufacturer's technical information and your site conditions.

What should I send to plan flooring or a staircase?

Room areas, level changes, preferred direction or layout, and transitions and trim details. For stairs, send the latest dimensions and configuration drawings so treads, risers, edges and adjoining finishes can be reviewed together.

Can you provide technical specs and care instructions?

Yes. Request the technical and maintenance information for the specific product — stated use, surface properties and cleaning guidance. Suitability depends on the product and installation conditions, so have your designer or installer confirm it for the intended area.

Which flooring and staircase products can you supply?

Flooring by thickness and grade, stair treads, nosings, skirting, thresholds and transition strips — as one coordinated package.

Can you calculate flooring quantities from our drawings?

Yes. We review areas, wastage, pattern requirements and batch needs against the layout drawings before ordering.

Do you provide installation instructions?

Yes — installation references, acclimatisation and subfloor or substrate requirements can be provided with the delivery. On-site installation stays with your local team.

Start a Conversation

Ready to Start Your Project

Share the project information you have. We will review the scope and prepare a quotation.

Any of these is enough to begin

  • Floor Plan
  • BOQ or Material List
  • Reference Images
  • Project Location and Timeline
Contact Us